
The Captain needs a break so as first mate, I will step up and do a little blogging. When you get into this life of no fructose and trying to eat as little processed food as possible some things can be a little challenging. One of those was finding bread made with either no sugar or just dextrose. It is actually a little scary to read the ingredient label of most breads on the shelves of our stores. Even this staple of life seems to be a chemistry experiment. I understand why, as they need to make it last but after I read the label It just doesn’t look that appetizing. Commercially we have found a few, mainly sourdough breads,that meet the criteria. Last summer we would splurge sometimes and buy Panera’s sourdough which is sugar free and if you go through the bakery department sometimes you will find some there too. For the most part though, I have decided to make our bread.
I actually got interested in making my own bread after reading a review of the book “Artesian Bread in 5 minutes a Day” by Jeffery Hertzberg MD and Zoe Francois. They have a method of making bread that is a little different but I gave it a try and we are very happy with the results. This won’t work for everyone as even though you only handle the bread for a couple minutes there is some rising time and baking time that you do have to be around for, so I think the 5 minutes a day part is a little misleading. It definitely would work for those that work at home, are at home mothers or like us are retired and are around a good portion of the day.
I don’t feel it’s right to give you the recipe but I did link to the book. I will show you the steps and a little about the equipment involved.


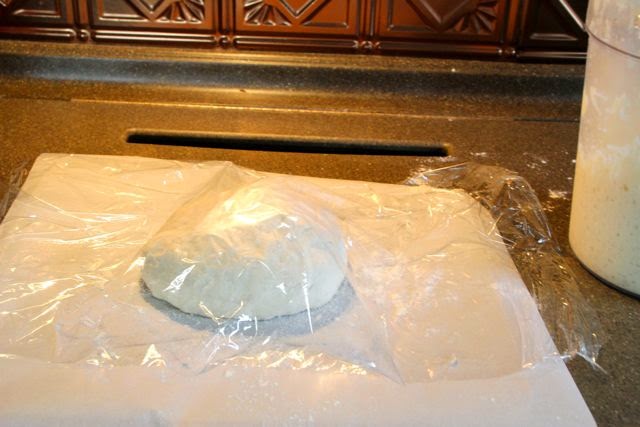 First you need a food grade container with a lid. I use a 4 qt.food grade container, the book calls for a 6 qt one. The 4 qt. seems big enough to me. The bread is actually mixed in this bucket and then left to rise for 2 hours. At that time it goes into the refrigerator with the lid on loosely. You can make a loaf from this after the 2 hours but it really does better if it has been left in the refrigerator for a few hours or overnight. When you are ready to bake, pull off a piece of the dough and form a ball. No kneading is necessary and they explain in the book how to handle the dough. I place my loaf on a floured piece of parchment paper and cover with plastic wrap. It then needs to sit and raise for about 90 minutes. After 90 minutes you preheat the oven with a pizza stone on the middle rack and the oven set at 450 degrees. Just before baking you will brush it with a little water and make a couple slits with a serrated knife in the top of the loaf. After the oven/ stone have pre-heated you slide the dough onto the pizza stone and in a broiler pan below it you add a cup of water that adds the element of steam to the baking. Bake the loaf on the parchment paper for 20 min then slide it off the paper directly onto the stone and bake for another 20 minutes. After all this, out comes a beautiful loaf of homemade bread. Delicious!
It seems like a lot of work but the mixing only takes about 10 minutes and getting it ready to bake less than 5 min. The rest is just waiting time.
Like I said, this will work for some and maybe not for others of you. I love the process and the product so it is what I have chosen to do. I did consider a bread machine also but because I have the time this works for me. I think if I had kids at home and was working, the bread machine would be a good alternative. Then a little research to find a non-sugar recipe.
There are some challenges to living with out processed sugar and some of them take time. What I hope is to show you some of the ways I have found to deal with these changes. Even though I usually have the time I really don’t want to spend everyday cooking and baking so I am working on some future posts to how you how I get around some of that too.
No comments:
Post a Comment